Posing Tips for Brides
“We are so awkward in front of the camera, we don’t really know how to pose… is that okay?”
“We don’t really like ‘posed’ photos, we’d prefer candids…”
If I had a dollar for every time I heard one of these during a consultation I would be on a fancy vacation with my cat right now instead of writing this post! What most people don’t realize is that the majority of the images you see on my website and Instagram are all posed and very few are real candids.
The true purpose of posing is to use body language to create an image that portrays a specific feeling or vibe. Unfortunately, we’ve all seen posing done so poorly, so often, that a lot of people think of posing itself as being a bad thing. It’s really not though! By using natural body language in a pose, we can create natural, and flattering portraits!
Posing really is one of those topics that has so many little nuances that we could spend an endless amount of time on it. But the purpose of this particular article is to help you, the bride-to-be (or really any woman) look great in your photos! So for today, we’re just going to cover some basics to help you get an idea of how to move your body into flattering positions while being photographed.
Something I have to mention before we get into the tips! While it’s awesome for you to take the initiative and learn some basic posing principles, please don’t forget that it is your photographer’s job to direct you into poses that are natural and flattering. Hire an experienced photographer who knows how to direct the posing. Additionally, I highly recommend scheduling an engagement session with the same photographer who is going to photograph your wedding because it will allow you to learn some basic poses, build rapport, and work through any awkwardness before the big day comes.
Alright, onto the good stuff!
Create curves
Typically for female bodies, we want to create a slight ‘S’ shape to accentuate feminine curves. The general rule is if it bends, don’t leave it totally straight or it will appear stiff and awkward. As you’re being photographed allow for slight, natural bends and curves at joints (wrists, elbows, knees, knuckles, etc)
The best place to start is your stance. Keep your feet close together, with a kicked hip (bend the leg closest to the camera and point your toe as you put all of your weight on your back leg). Crossing the bent knee in front of the straight knee will also add a tapered look to your legs and add curves. Regardless of your overall body type, this will help shape your legs and hips, and reduce the amount of attention drawn to unwanted areas (like the stomach). Your photographer will direct you as to how pronounced these movements should be depending on if the photograph is meant to be more natural (like during family photos) or dramatic (a fashion style portrait).
One area you will NOT want to add a curve to is your upper back and shoulders. It’s important to keep your posture straight while allowing your shoulders to relax so that you don’t appear slumped over or unconfident.
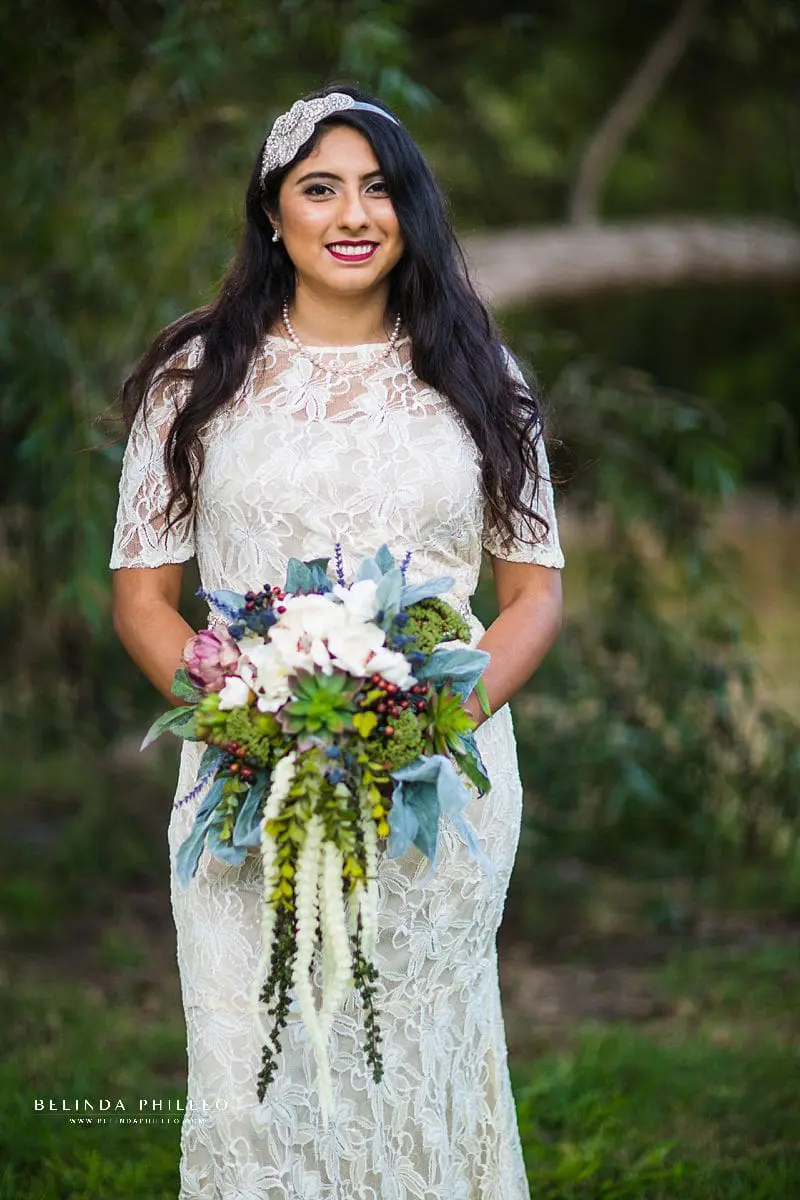
Below are some examples of creating curves and, as you’ll see, other tips we’re going to discuss.

Separation
Now that you’ve created all these beautiful curves with your legs and hips, you want to make sure that they’re visible! You need to leave some space between your arms and your midsection so that you don’t make yourself appear wider than you are! Have you ever noticed how ladies often pose for a photo with at least one hand on their hip? It looks so much better than just letting an arm hang limply, right? That’s a classic example of separation!
One easy way to do this is just to give a slight bend to your elbow(s) either while holding your bouquet or while your hand rests naturally against your thigh. As a bonus, having this slight flex in your arm can be much more flattering for your arms too!
A slight bend will yield a more relaxed and natural look, while a hard angle will appear more posed, or more dramatic (like how a model would pose in a fashion shoot). As an example, holding your bouquet low with a slight bend in your elbows can allow for separation in your midsection while preventing your flowers from blocking the shape of your waist or bust. Your photographer will help you fine-tune this positioning to ensure that the camera sees the defining edges of both your arms and curves.
The image above this section, as well as the images below, show us some examples of creating separation and showing off curves when posing for portraits.

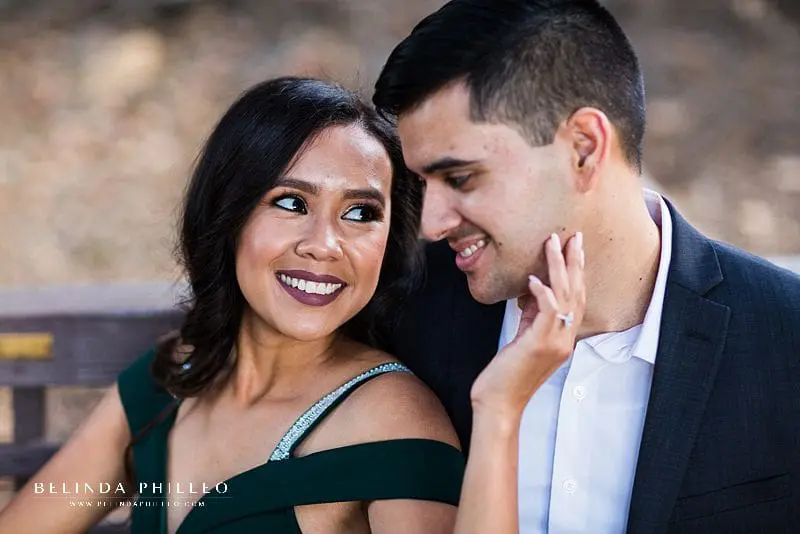
Natural Hands
It’s funny how little things can make a HUGE difference. Stiff hands can kill a natural-looking pose and make the entire image feel awkward. Never in day to day life do we hold our hands or fingers completely straight, so don’t do it while you’re being photographed! As I said under the Curves section, if it has a bending joint, allow for some natural bends and curves. If you’re struggling with this, just think about the way a ballerina holds her hands, and aim for that – soft, delicate, slightly curved.

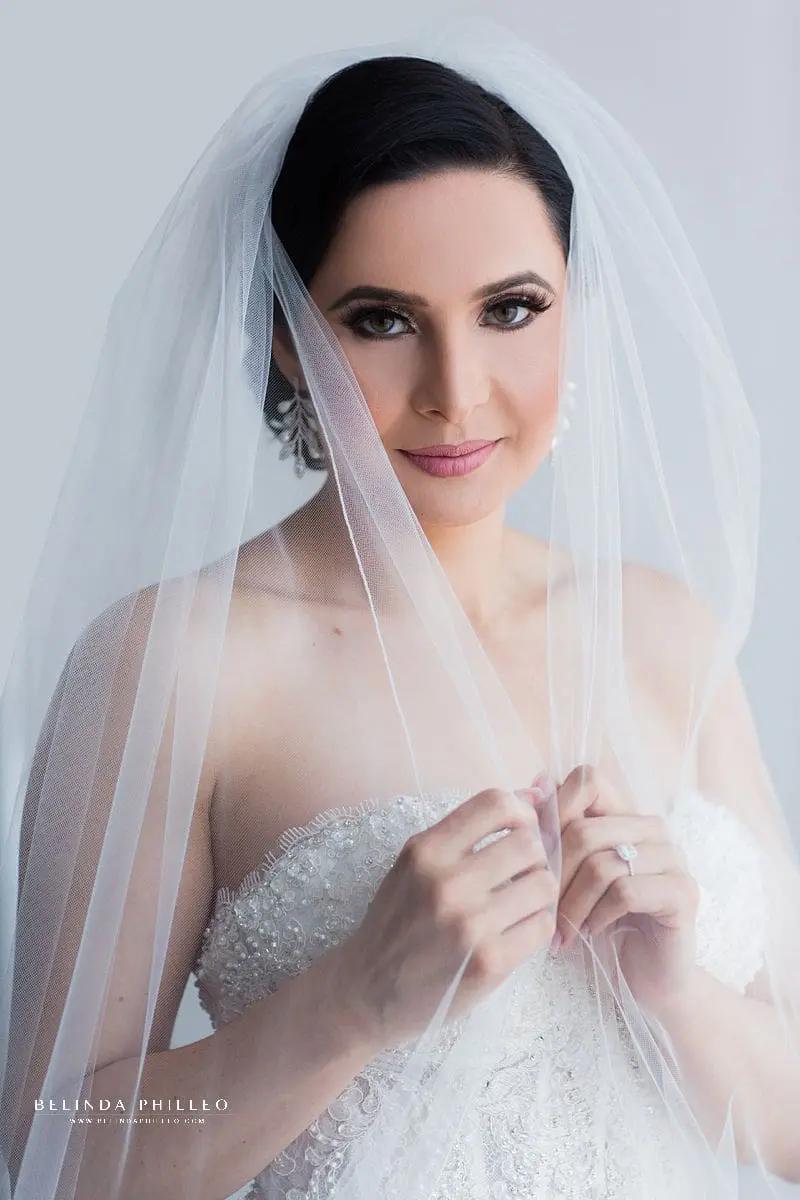
Chin Out
This may be the trickiest posing tip to master. Often, when we’re told to put our chin out, we instinctively pull it up and it ends up showing off more of our neck and nostrils – not so flattering! Instead, you actually want to push your chin forward (and sometimes even slightly down) by extending your neck. If you’re doing it correctly it might feel a little weird at first, but this extending of your neck can make it look longer and prevent the appearance of a double chin. The key to exactly how you do this will depend much on the angle of the camera itself, so your photographer will guide you in perfecting your chin placement.
The images above this section, as well as the one below, are great examples of this posing tip in action!

If you’re feeling extra nervous about being in front of the camera it doesn’t hurt to try these in front of a mirror a few times to get a feel for what it looks and feels like when you move into these positions. Don’t stress yourself out if you do this and find yourself feeling a little awkward or silly. Your professional photographer will help you finesse the positioning during your session to help you look more natural and less “pose-y.” It’s not just about having a great pose, it’s also about tweaking the pose to suit the camera angle and desired outcome.
I hope this post about posing tips for brides helped you! I’d love to hear which tip you enjoyed the most! Feel free to tell me your thoughts in the comments.
If you’re ready to schedule your shoot or wedding photography, I’d love to help walk you through the process! Fill out my contact form to set up a brief discovery call and get more information.